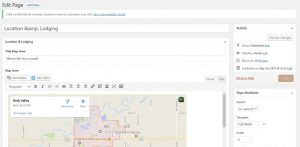
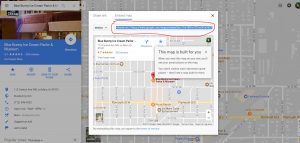
The top box is where you will type the name of the page. Most page names are placed in for you. In order to fill out the map area, first, go to Google Maps and type in your location. Then, click "Share" on the left sidebar that pops up. Choose a sizing option; medium is the default. Next, click "Embed map" and copy the code (hint: it begins with <iframe src= ).
Go back to editing your page and click the "Text" tab in the Map Area. Paste your code in and continue filling out the other portions. Below the Map Area, you can include the names, descriptions, and images of the lodging people may be able to use if they come from out of town. Fill out only the portions you desire or need.
You must click "Update" when you are finished otherwise it will not save your changes.